
Declarative vs Imperative
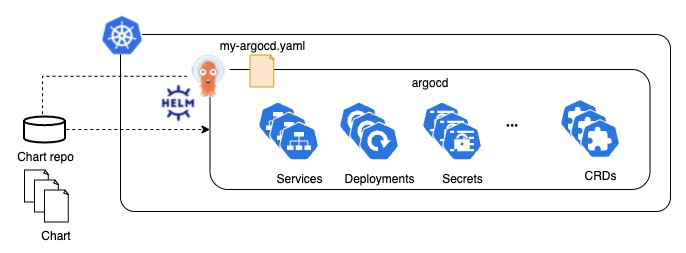
In my previous post, I explained how to install ArgoCD via Helm. Now, let’s discuss how to operate it. How can we update ArgoCD? How do we change its configuration? Updating ArgoCD can be done through the helm upgrade command, which follows an imperative approach. However, if you’re a DevOps engineer or an infrastructure engineer, you might prefer managing it declaratively. In this article, I will share how to manage ArgoCD declaratively using ArgoCD. 🐙
- Preparation
- Create an application manifest file using ArgoCD UI
- Apply the application’s manifest to k8s
- Sync on the ArgoCD UI
- Summary
- References
Preparation
If you haven’t installed ArgoCD yet, please install it referring to my previous post.
Create an application manifest using ArgoCD UI
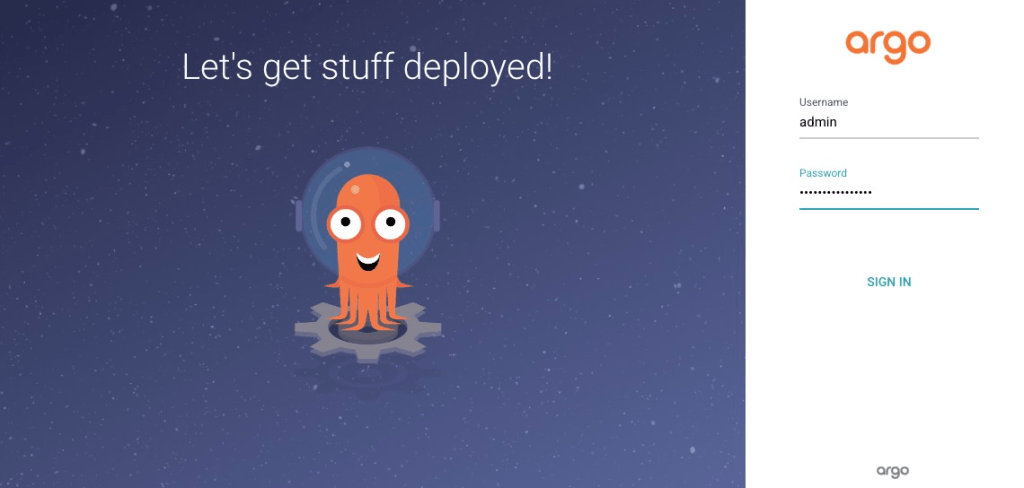
Sign in ArgoCD
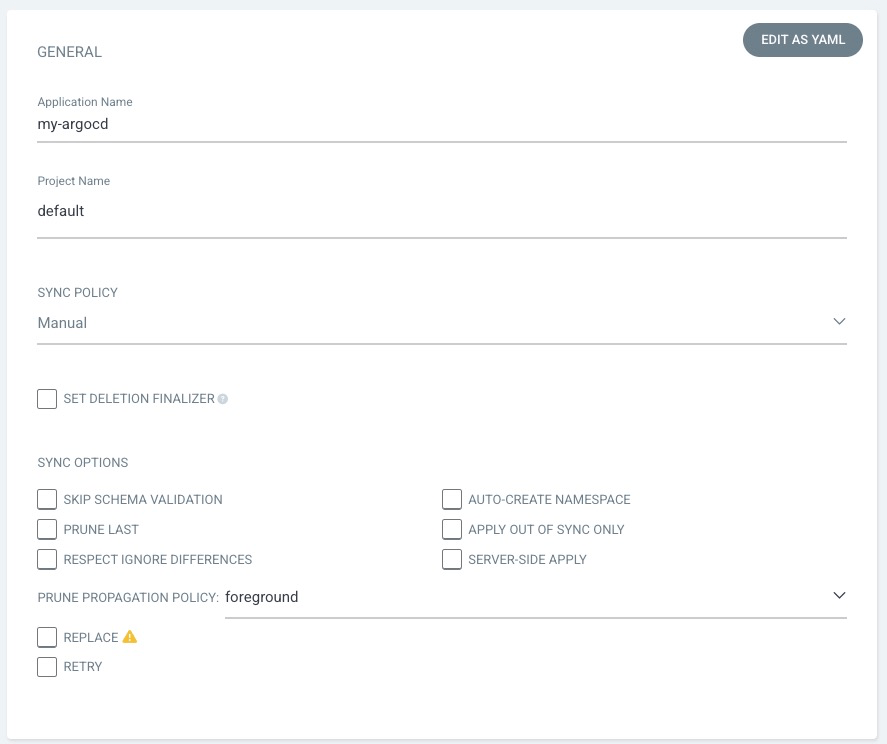
Create a new app

Set General fields
- Application Name:
my-argocd - Project Name:
default - Others: Keep default value
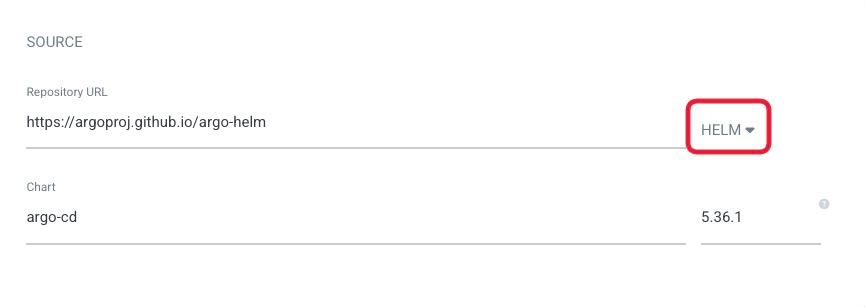
Set Source fields
- Repository URL:
https://argoproj.github.io/argo-helm - Repository type:
HELM - Chart:
argo-cd - Version:
5.36.1
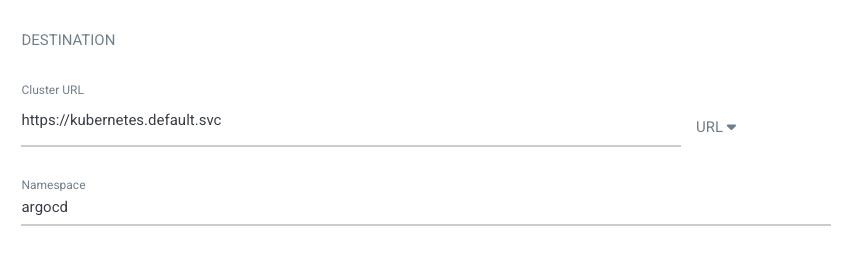
Set Destination fields
- Cluster URL:
https://kubernetes.default.svc - Namespace:
argocd
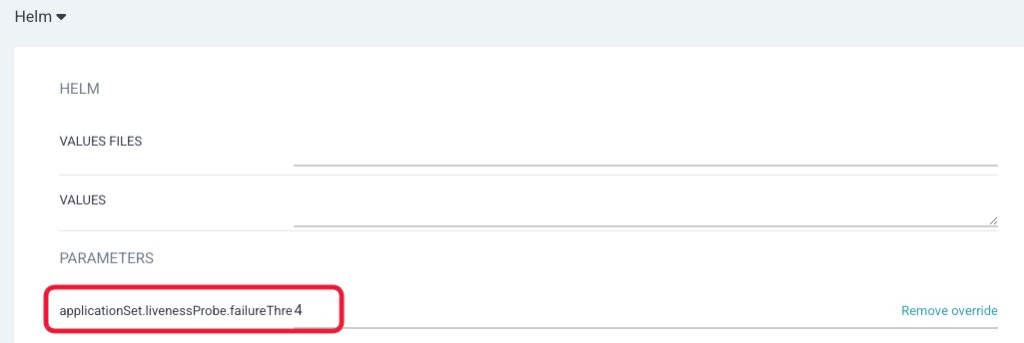
Set others
If you’d like to change default values of helm, please change in the Helm section. This time, I changed the following setting.
- applicationSet.livenessProbe.failureThreshold:
4
Copy Settings in YAML format
Click the EDIT AS YAML in the upper right corner.

Copy the value and past it in your file in a local machine. I named it my-argocd.yaml. This is exactly the definition file for ArgoCD!
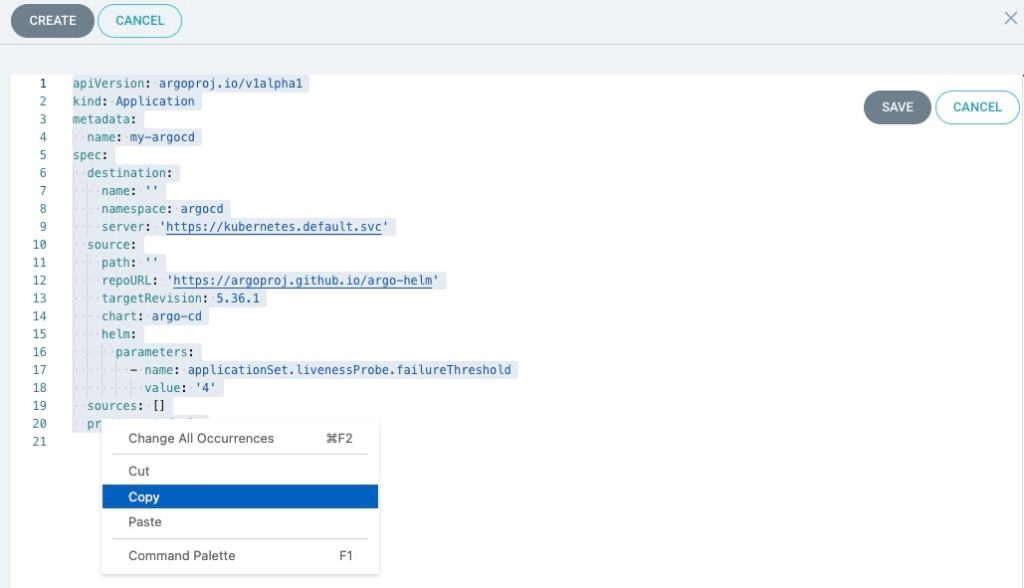
apiVersion: argoproj.io/v1alpha1
kind: Application
metadata:
  name: my-argocd
spec:
  destination:
    name: ''
    namespace: argocd
    server: 'https://kubernetes.default.svc'
  source:
    path: ''
    repoURL: 'https://argoproj.github.io/argo-helm'
    targetRevision: 5.36.1
    chart: argo-cd
    helm:
      parameters:
        - name: applicationSet.livenessProbe.failureThreshold
          value: '4'
  sources: []
  project: default
Close the modal window
Please close the modal window. Please don’t create it because we will create it using the manifest!

Apply the application’s manifest to k8s
Please apply the manifest to your kubernetes.
kubectl apply -f my-argocd.yml
Note: Application is a ArgoCD’s Custom Resource Definitions.
$ kubectl get customresourcedefinitions.apiextensions.k8s.io applications.argoproj.io
NAME                       CREATED AT
applications.argoproj.io   2023-06-16T13:35:02Z
$ kubectl get sts
NAME                               READY   AGE
my-argocd-application-controller   1/1     96m
Sync on the ArgoCD UI
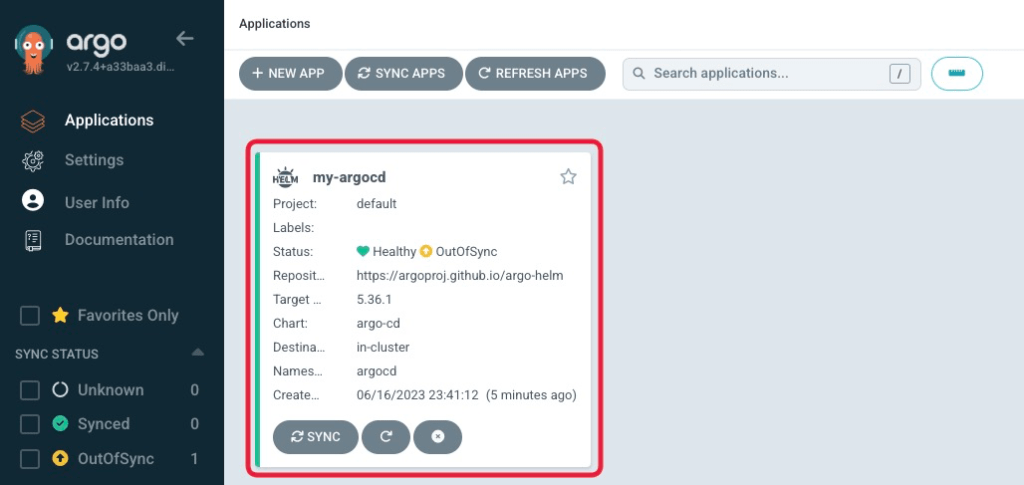
Now you can see application named my-argocd on the ArgoCD UI.
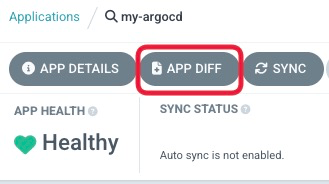
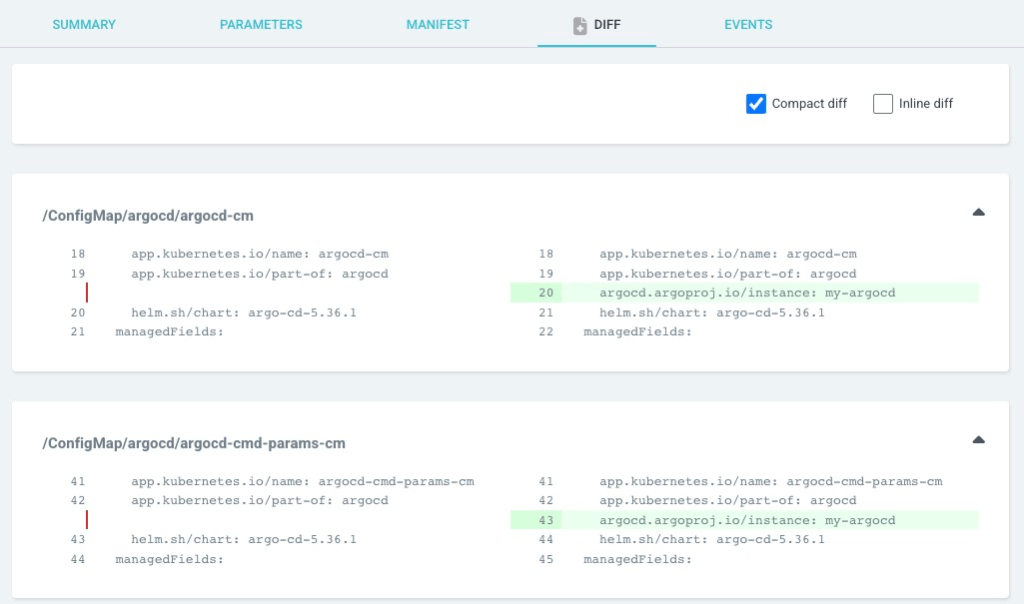
Check DIFF
You can check the differences on it. You can see ArgoCD add some annotations to all resources. Please check if there are no unexpected differences.
Release it by SYNCHRONIZE
Please click SYNC, and SYNCHRONIZE.
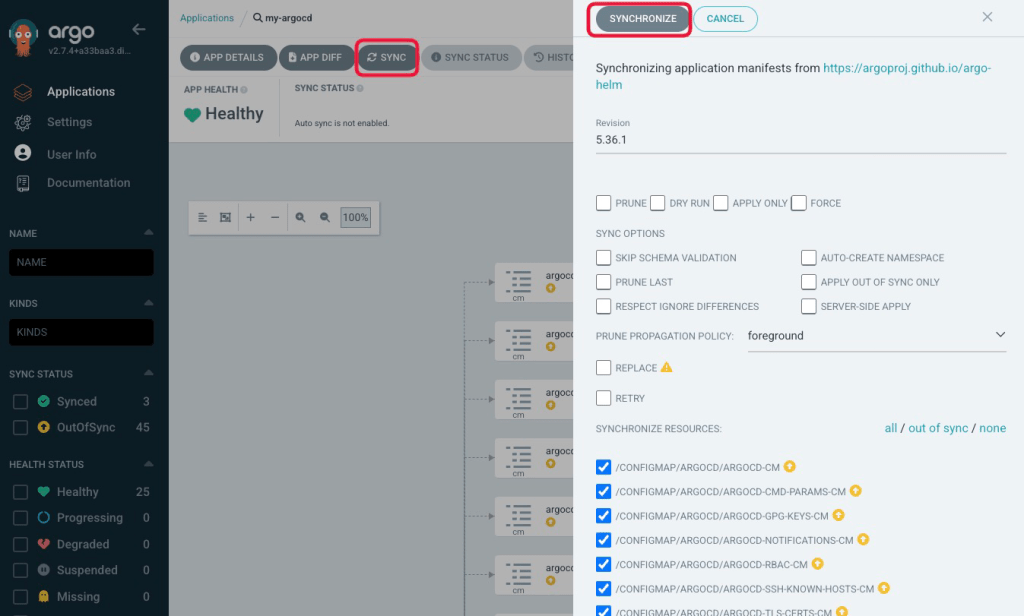

If the synchronization status becomes Synced, it means that ArgoCD successfully manages ArgoCD itself!
Summary
I explained how to manage ArgoCD by ArgoCD declaratively. With the manifest file that we created, version management can also be easily done using Git.
References
Thank you for reading my post! 🐙
